How to connect Mail Blaze to your Springnest website
If you’re a Springnest client and you’re looking for help connecting your Mail Blaze account to your Springnest account, this is the article for you.
PLEASE NOTE: If you don’t have a Mail Blaze account yet, you need to create one first, and create a list before you can connect your account to your Springnest account.
In Mail Blaze
- Make sure that when you’re in your Mail Blaze account that you have created a new list.
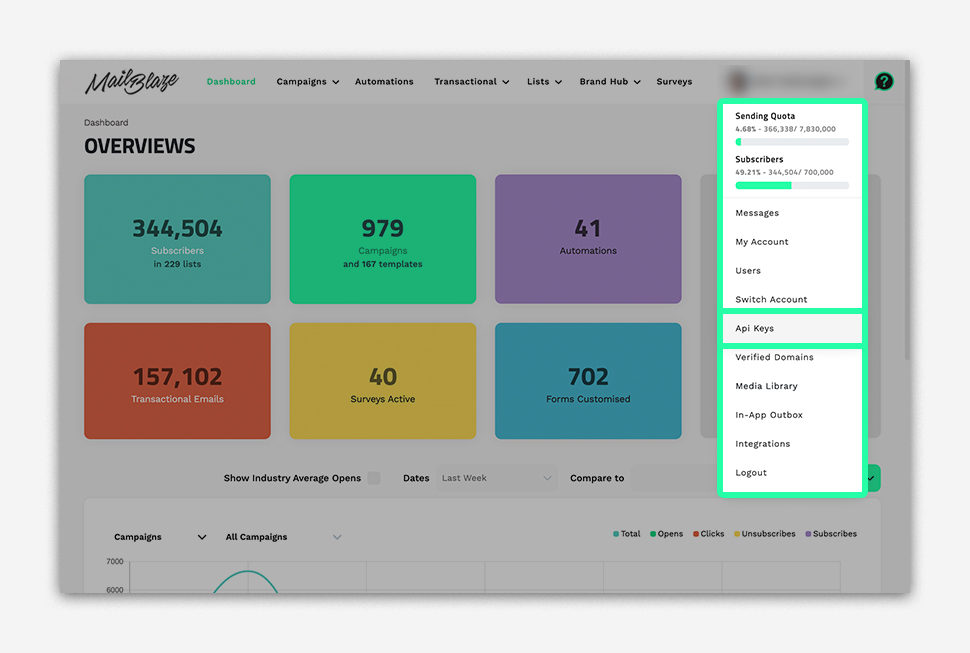
- Then go to your PROFILE NAME on the right-hand side of your screen, and click on API KEYS from the dropdown menu.
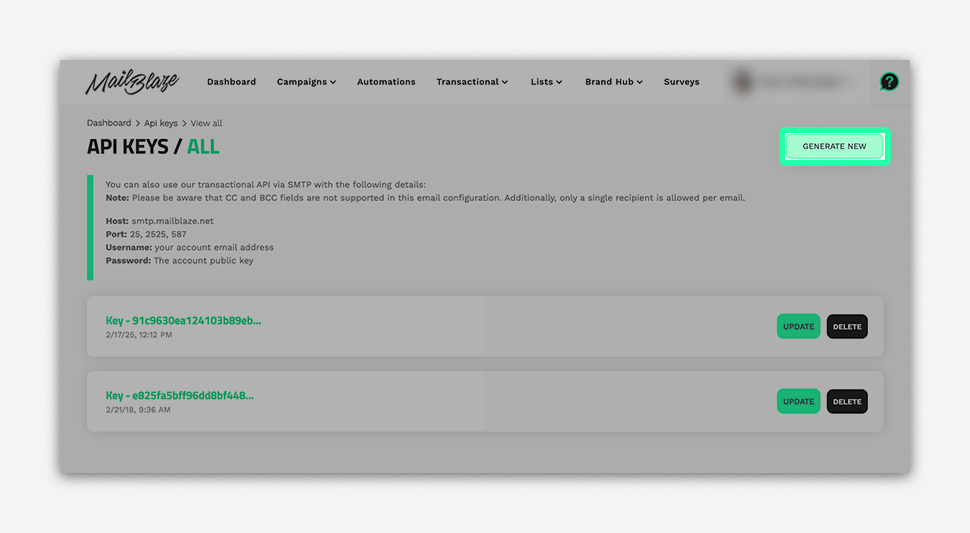
- Now you need to generate a new API Key.
Click on the button that says GENERATE NEW.
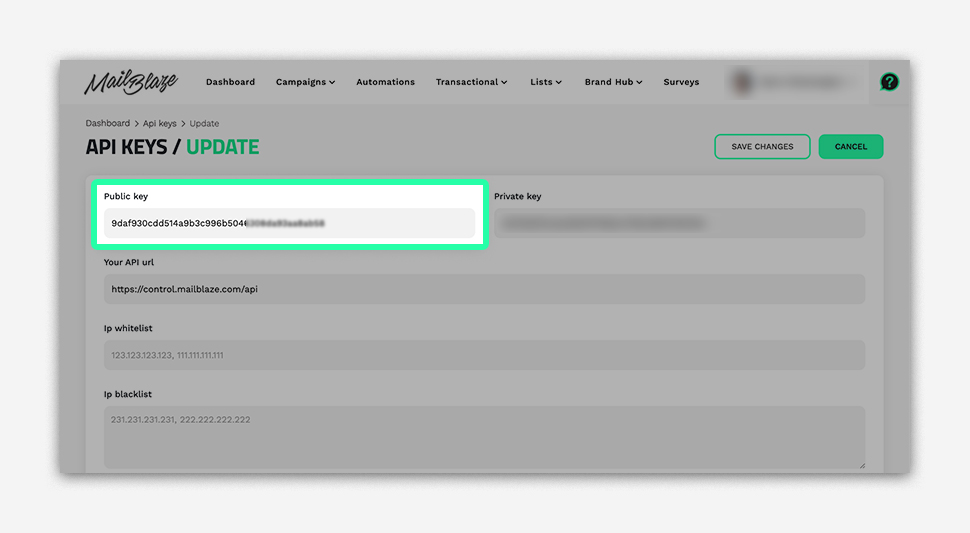
Copy the key that you’ve just saved. You’ll need this key to connect to Springnest.
In Springnest:
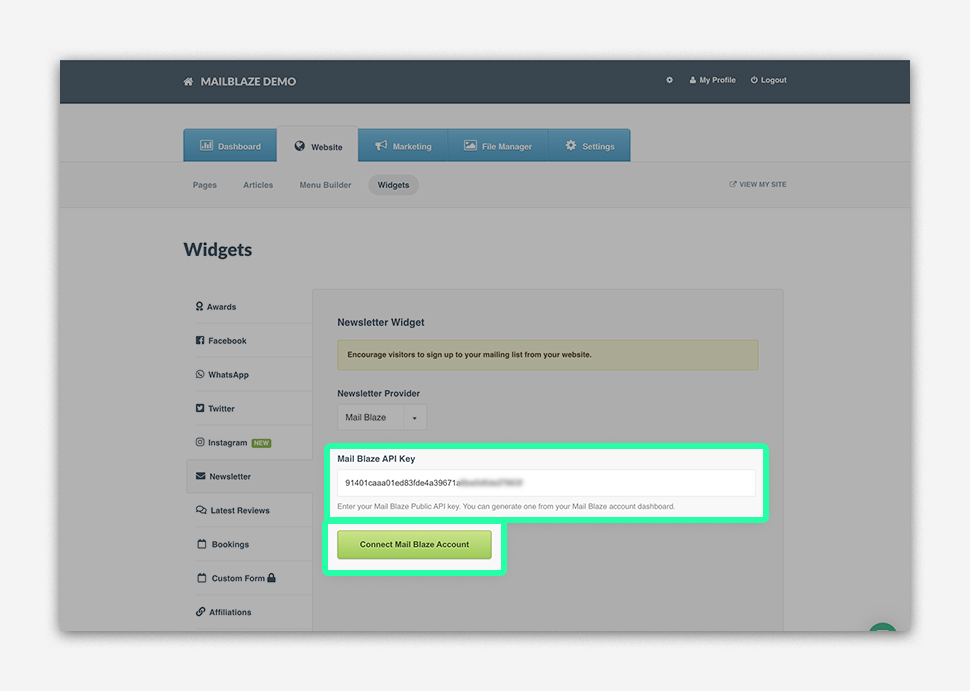
In your Springnest account, click on WEBSITE > WIDGETS > and then click on NEWSLETTER from the left-hand navigation pane. Under Newsletter Provider select MAIL BLAZE.
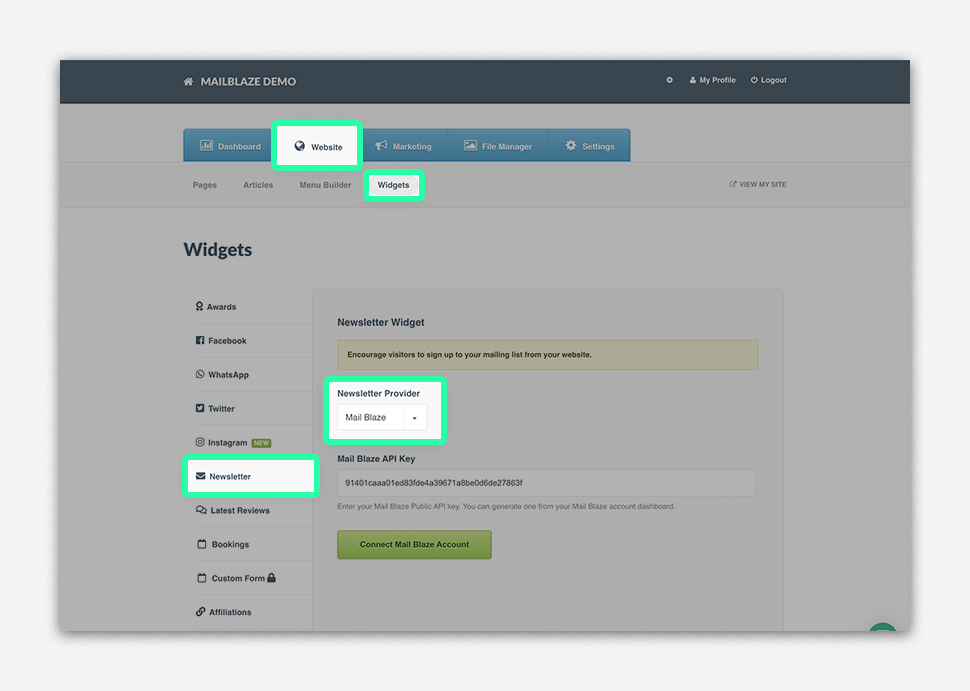
Now copy your generated API Key into the space provided and click on the button CONNECT MAIL BLAZE ACCOUNT.
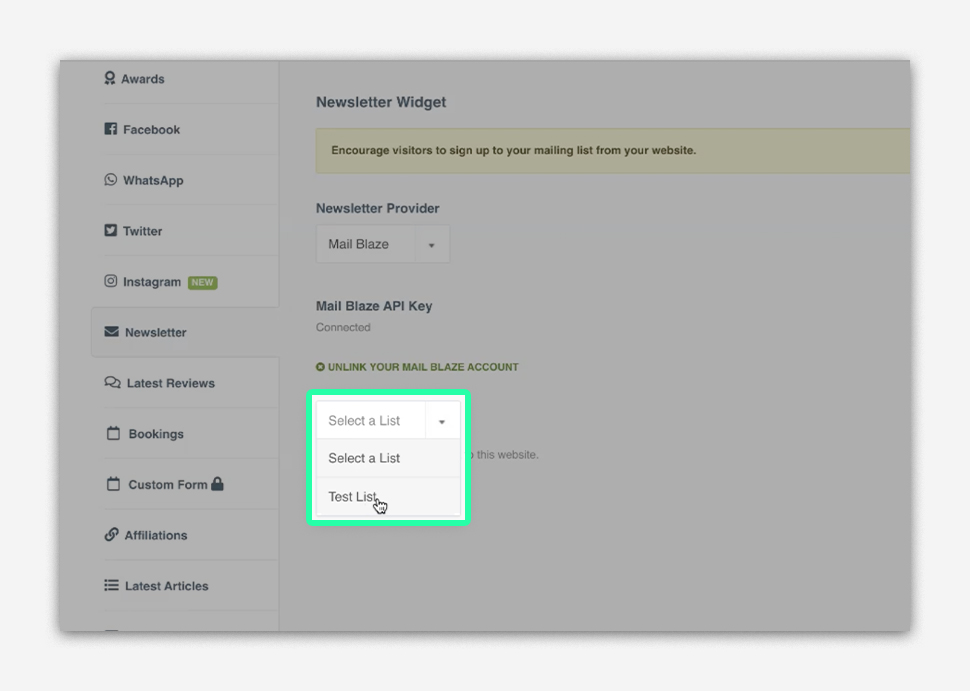
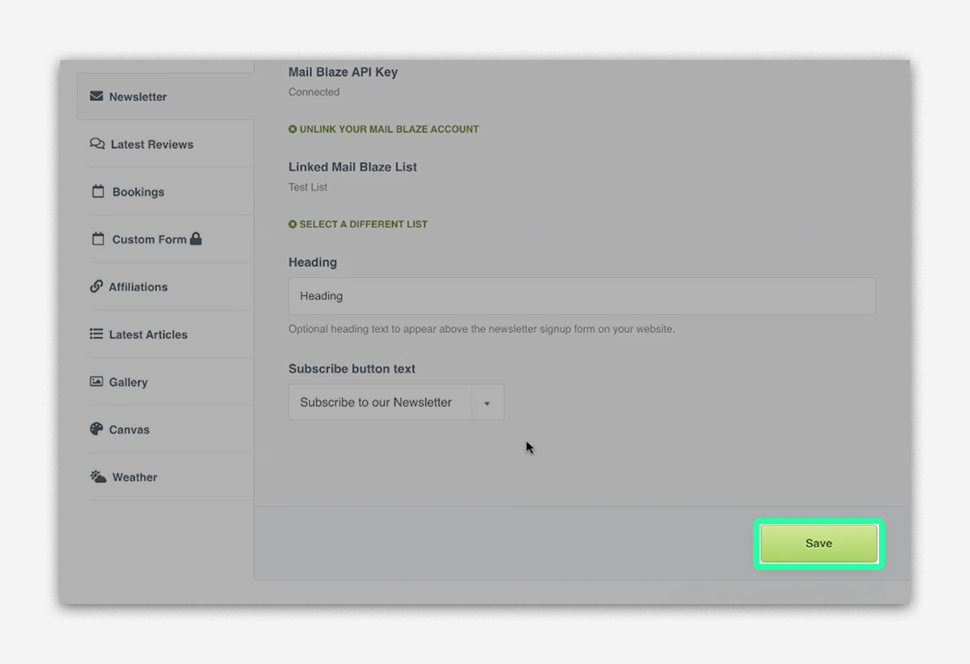
Now you’ll be prompted to select your LIST.
Once you’ve selected your LIST, you can customise your SUBSCRIPTION FORM.
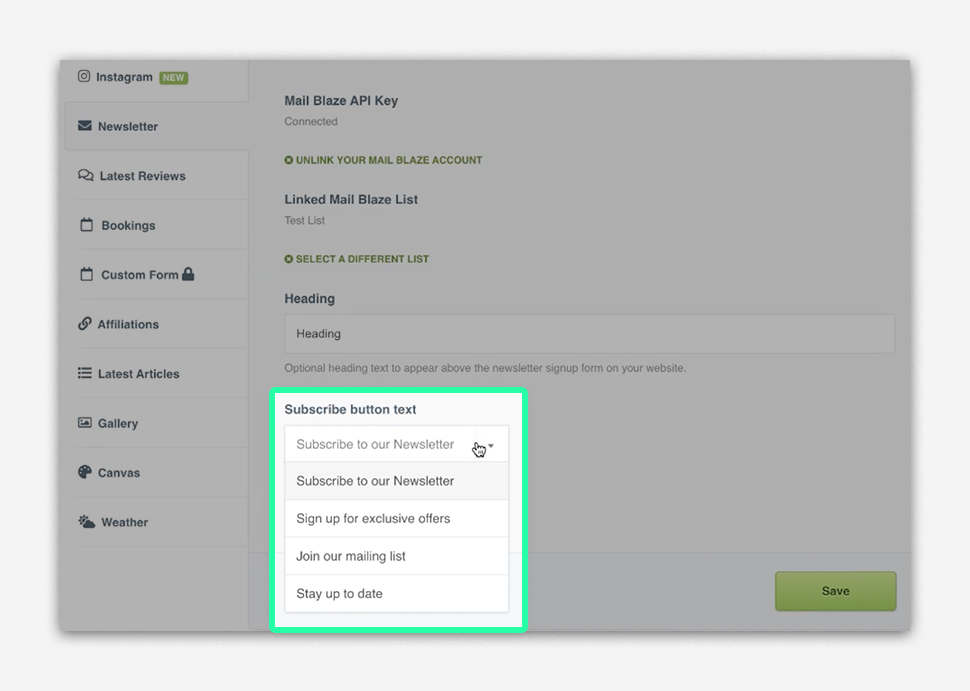
You’ll be able to update the heading and the subscribe button text.
Once you’re happy with your selections click on SAVE to apply your changes.
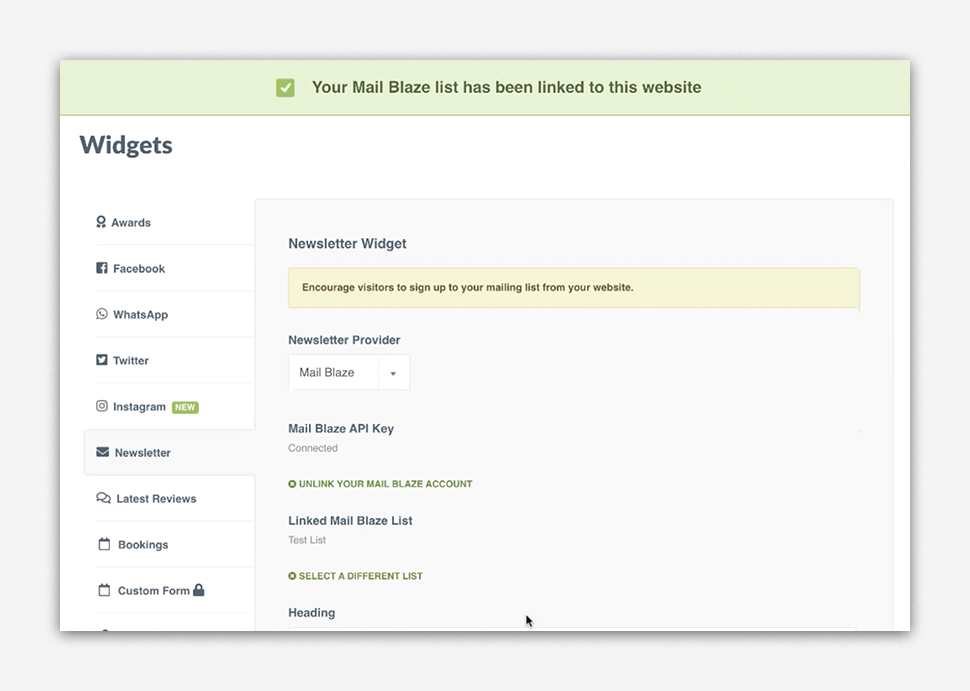
Your Mail Blaze account and Springnest website are now connected.
Want to have a pop up sign up form?
You can use a linked Pop up forms for your newsletter subscriptions if you’d prefer, by selecting Marketing from the Springnest interface > then selecting Popup and choosing Newsletter signups as your pop up. You can learn more about popups in the Springnest environment in this article. ADDING A POP UP MESSAGE TO YOUR SPRINGNEST WEBSITE